IMPORTANT NOTE
If you’re not given the option to add an Exchange account, it could be due to a change that Microsoft made in the 16.0.8431.2079 (and above) release of Outlook in September, 2016. This change introduced Microsoft’s “Simplified Account Creation” process that bypasses the ability to set up non-Microsoft Office365 accounts in Outlook. For information on the workaround for this, see the article: Enable EAS/Exchange Accounts in Outlook 2016.
Microsoft Exchange ActiveSync (EAS) is a data synchronization protocol that uses push technology to sync email, calendars and contacts (and tasks and notes on supported devices) to Outlook 2013 and 2016 for Windows and a variety of mobile phones and tablets, including Android, iOS, and Windows devices.
This article provides steps on establishing an Exchange account using ActiveSync in Outlook 2016, specifically version 1706 and above (released July 2017). These steps can be used for earlier versions of Outlook 2016 as well, or you can refer to Configure Outlook 2013/2016 with ActiveSync.
NOTE: Exchange ActiveSync is only available at the ENTERPRISE-MAIL service level. To utilize an Exchange ActiveSync connection, your account must first be assigned an ActiveSync mailbox. If you have been notified by the Email Administrator for your domain, or by a Central TX Mail representative that ActiveSync has been setup for your account, then follow these steps to sync SmarterMail to Outlook 2016 using ActiveSync:
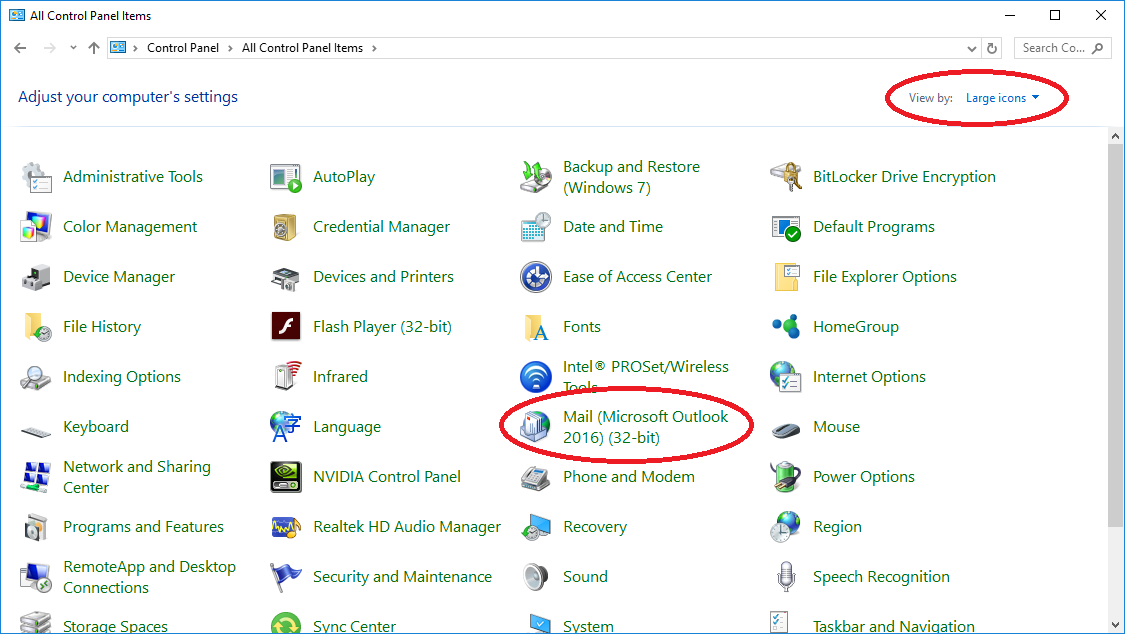
- On the computer where Outlook is installed, open the Windows Control Panel.
- Double-click on Mail (Microsoft Outlook 2016) to open the configuration settings for Outlook.
- Click on Email Accounts...
- On the Email tab, click on New....

- Select Manual setup or additional server types and click Next.
- Select Exchange ActiveSync and click Next.
- Enter the following details:
- Your Name - The display name that will be shown on emails you send.
- Email Address - Your full SmarterMail email address (ex: username@domain.com).
- Mail server - The address of the mail server. This typically takes the form of "mail.domain.com" or "webmail.domain.com". You may need to contact your SmarterMail administrator to learn the specific format used.
- User Name - Your full SmarterMail email address (ex: username@domain.com).
- Password - The password used with your SmarterMail account.

- Click Next and Outlook will test your account settings. If the connection is successful, Outlook will begin importing the SmarterMail mailbox. (If the test connection results in errors, please start a Support Ticket.)
Article ID: 9, Created: 5/10/2018 at 5:03 PM, Modified: 6/7/2018 at 6:19 AM